Difficulty: Beginner
Time to Complete: 20-30 min
Materials
- Phthalo Blue Gouache
- Lemon Yellow Gouache
- Permanent Rose Gouache
- Permanent White Gouache
- #8 Round Brush
- #4 Round Brush
- Cold Press Watercolor paper
You’ll also need a jar of water for cleaning your brushes, a mixing palette and paper towels or rags for cleanup.
Paint Consistency
While layering paint, it’s important to start with the right consistency. You want to have a smooth consistency like heavy cream.
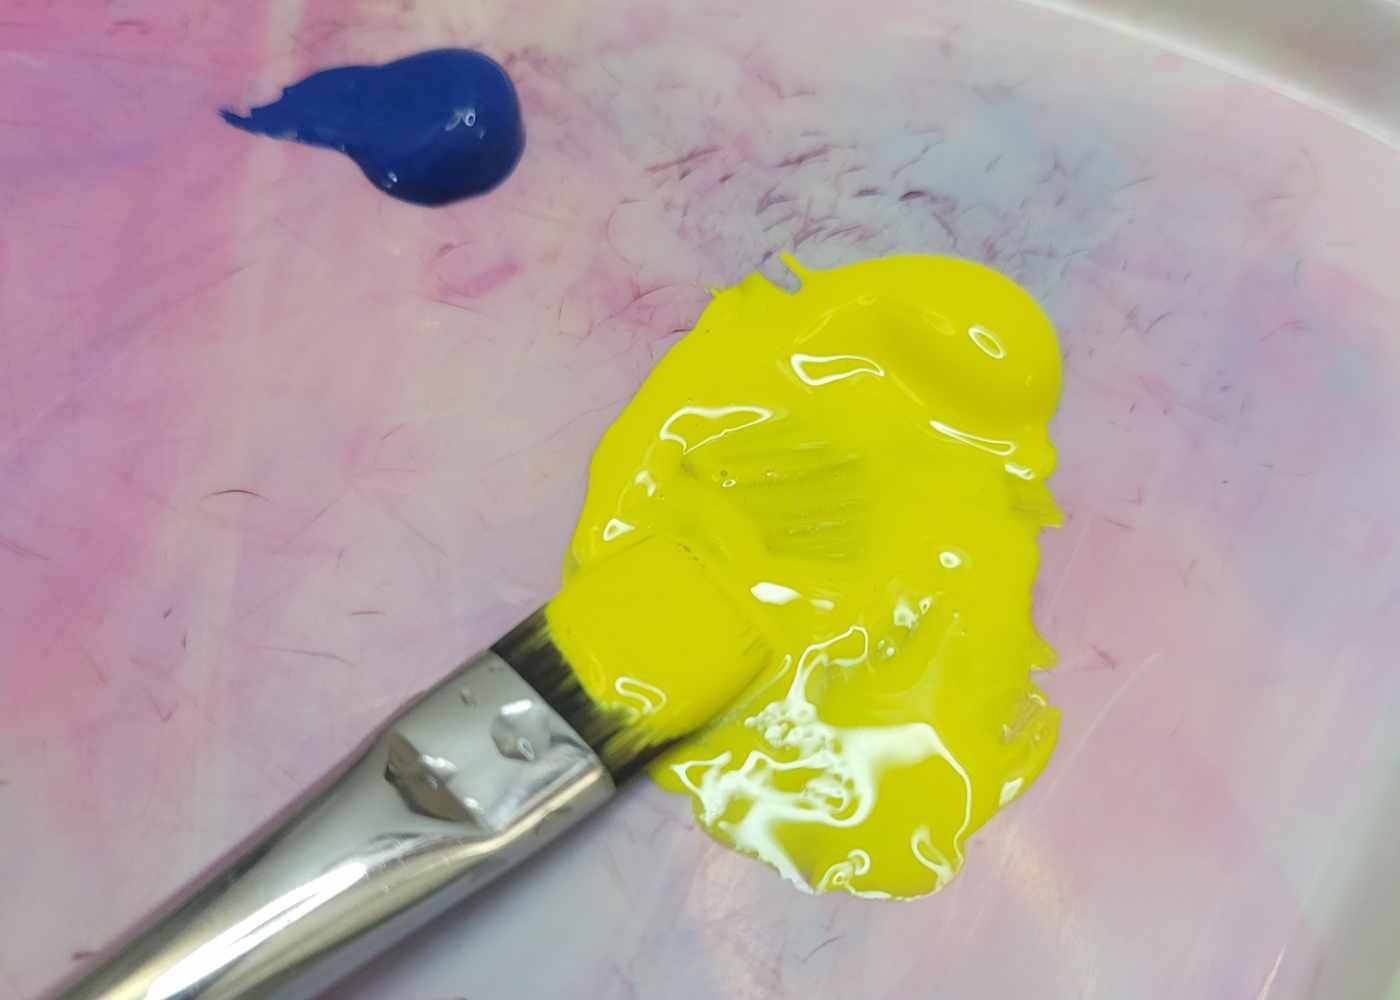
To get this, squeeze some paint from the tube and mix in a little clear water. When you paint with it, it should glide evenly onto the paper and be opaque. If it’s transparent like watercolor, then there’s too much water. If the paint sticks and doesn’t want to move, there’s not enough water.
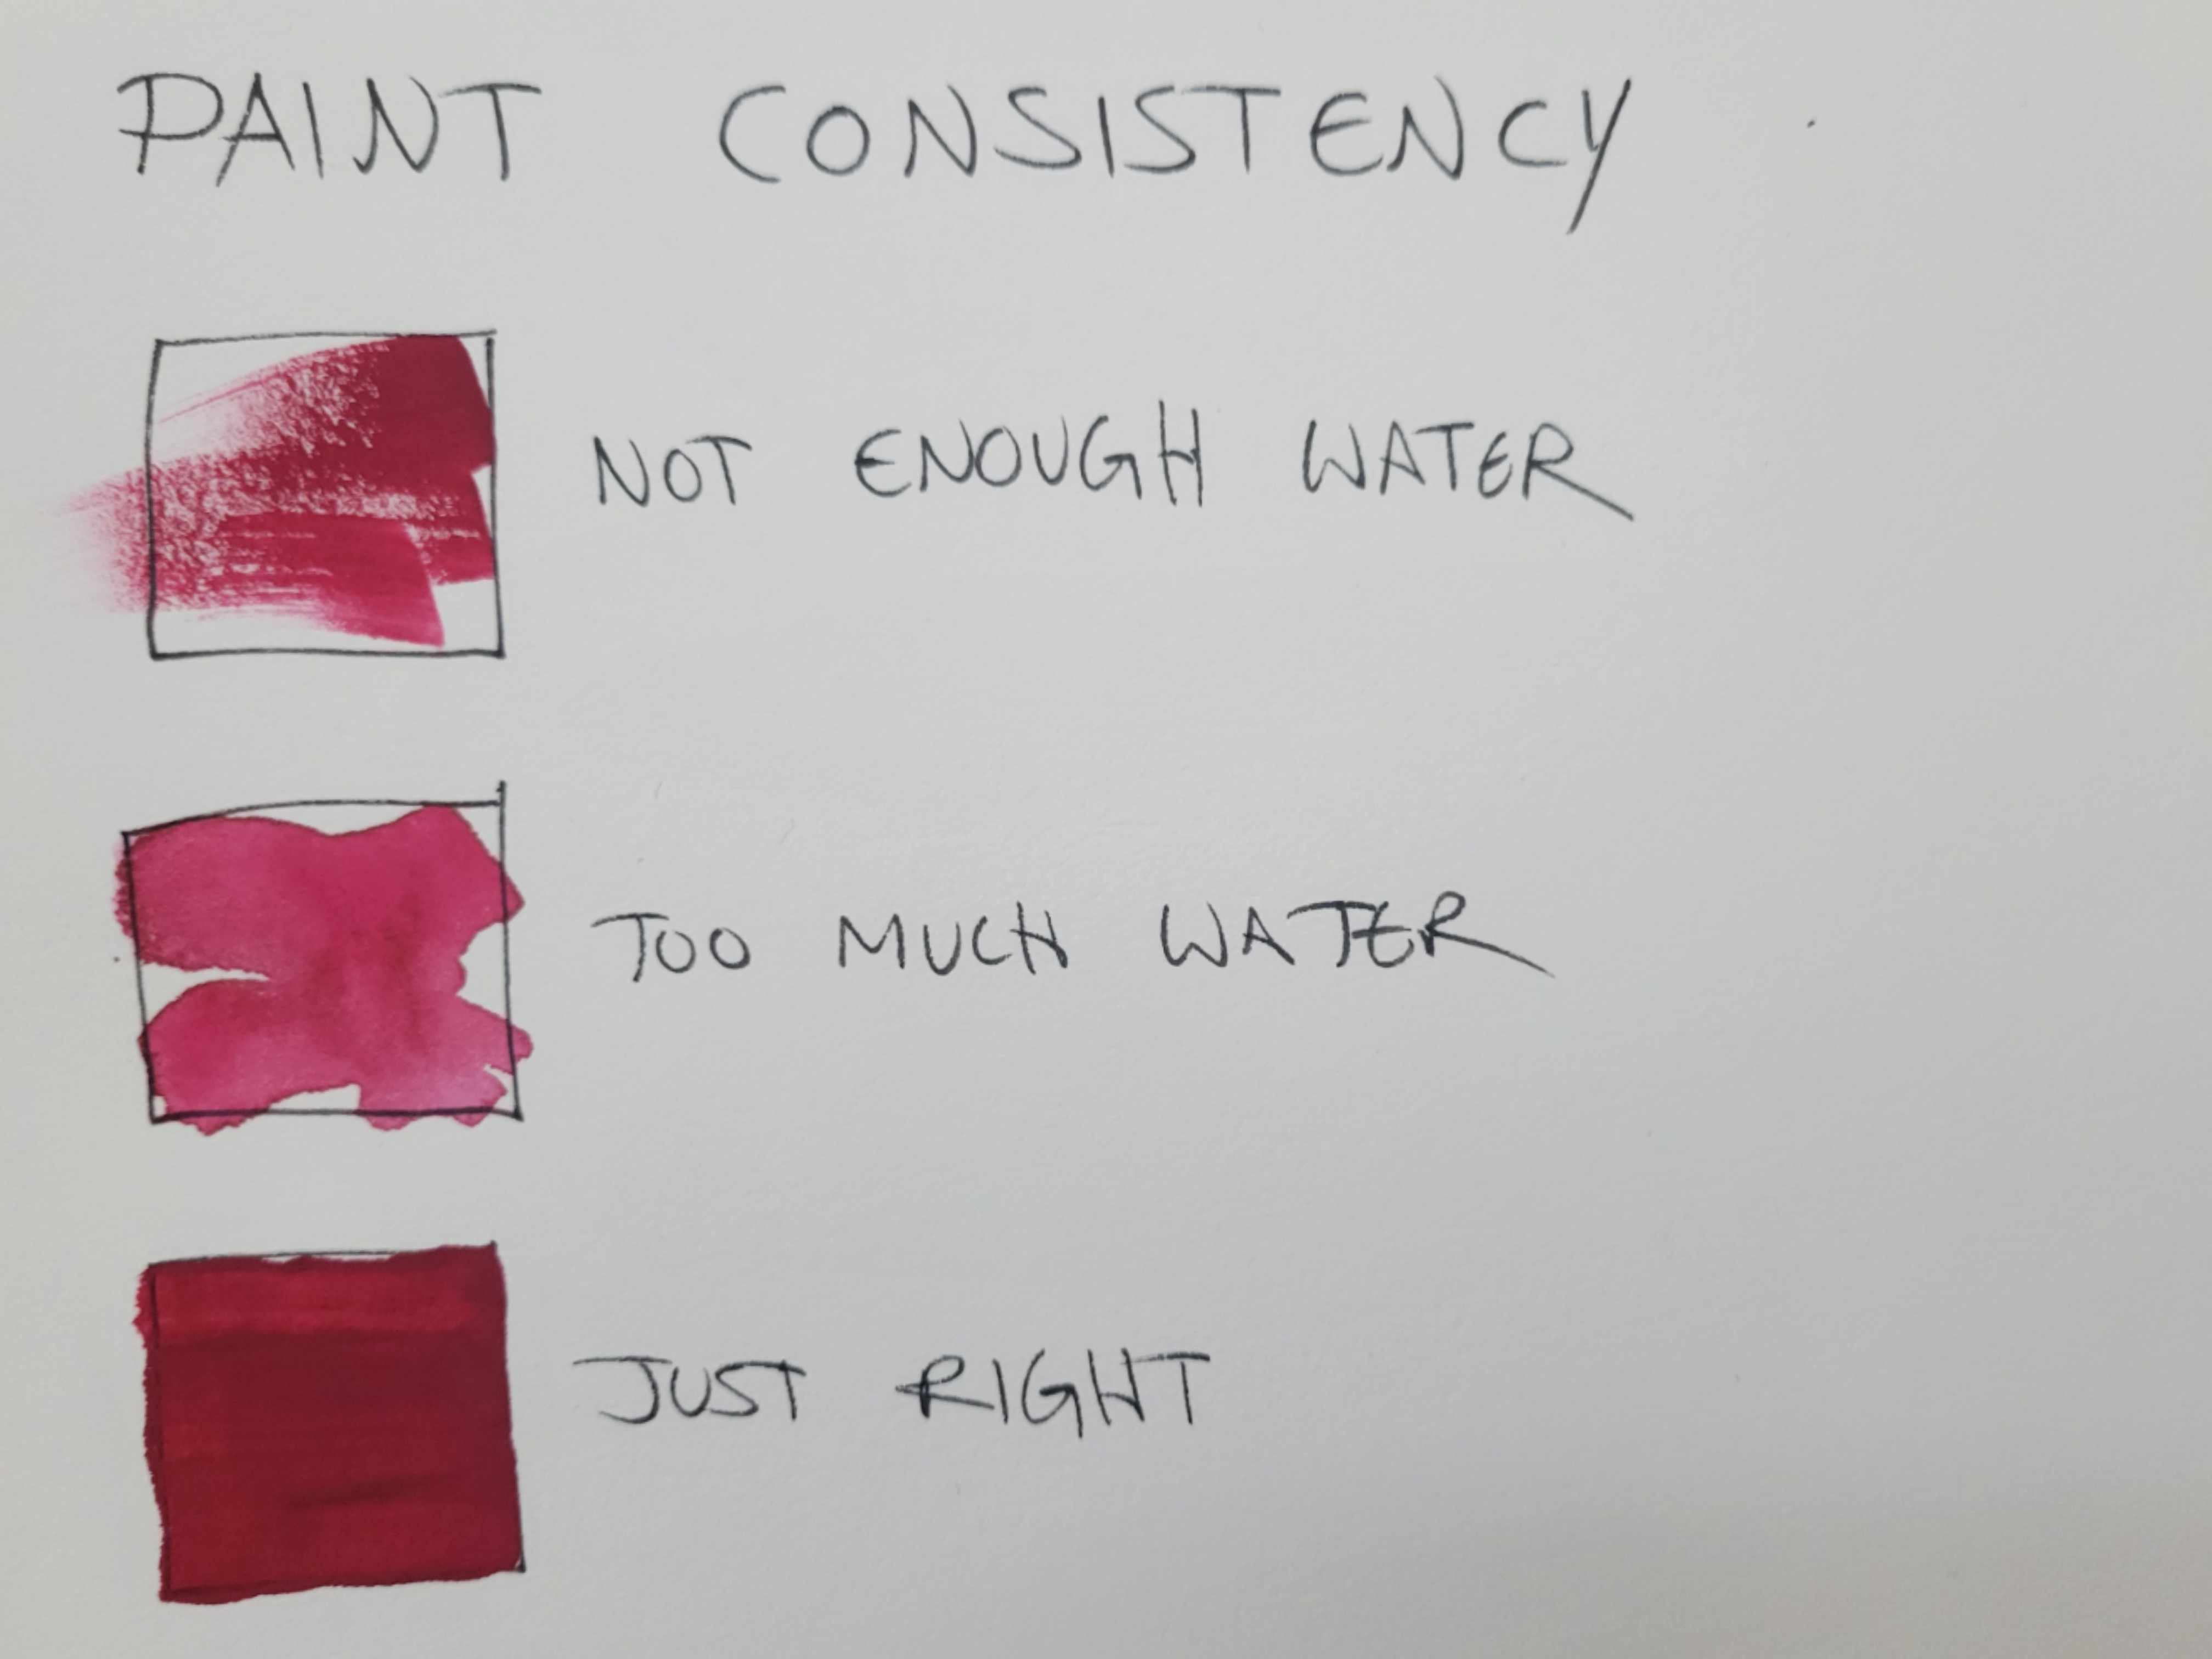
It takes a little practice to get a feel for it but once you do it will become second nature.
The Layering Technique
To layer Gouache, pick one color and paint a flat area. You don’t need any special brush technique for this. If the paint is the right consistency it will just flow off the brush. When finished, let it dry completely before continuing.
Once the first layer is dry, paint another color right on top of it. That’s it.
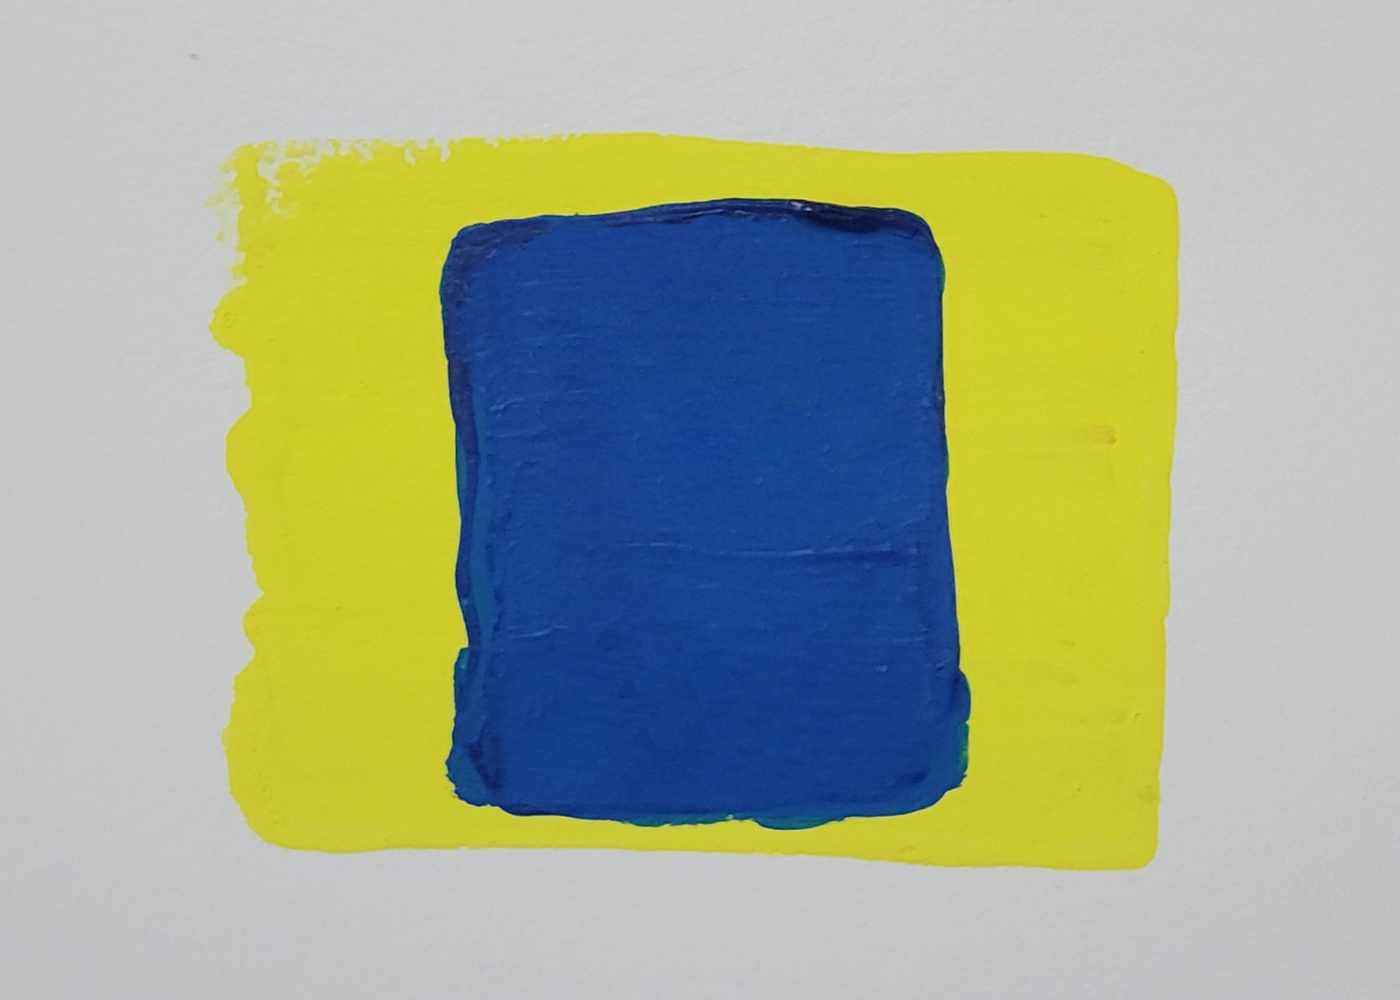
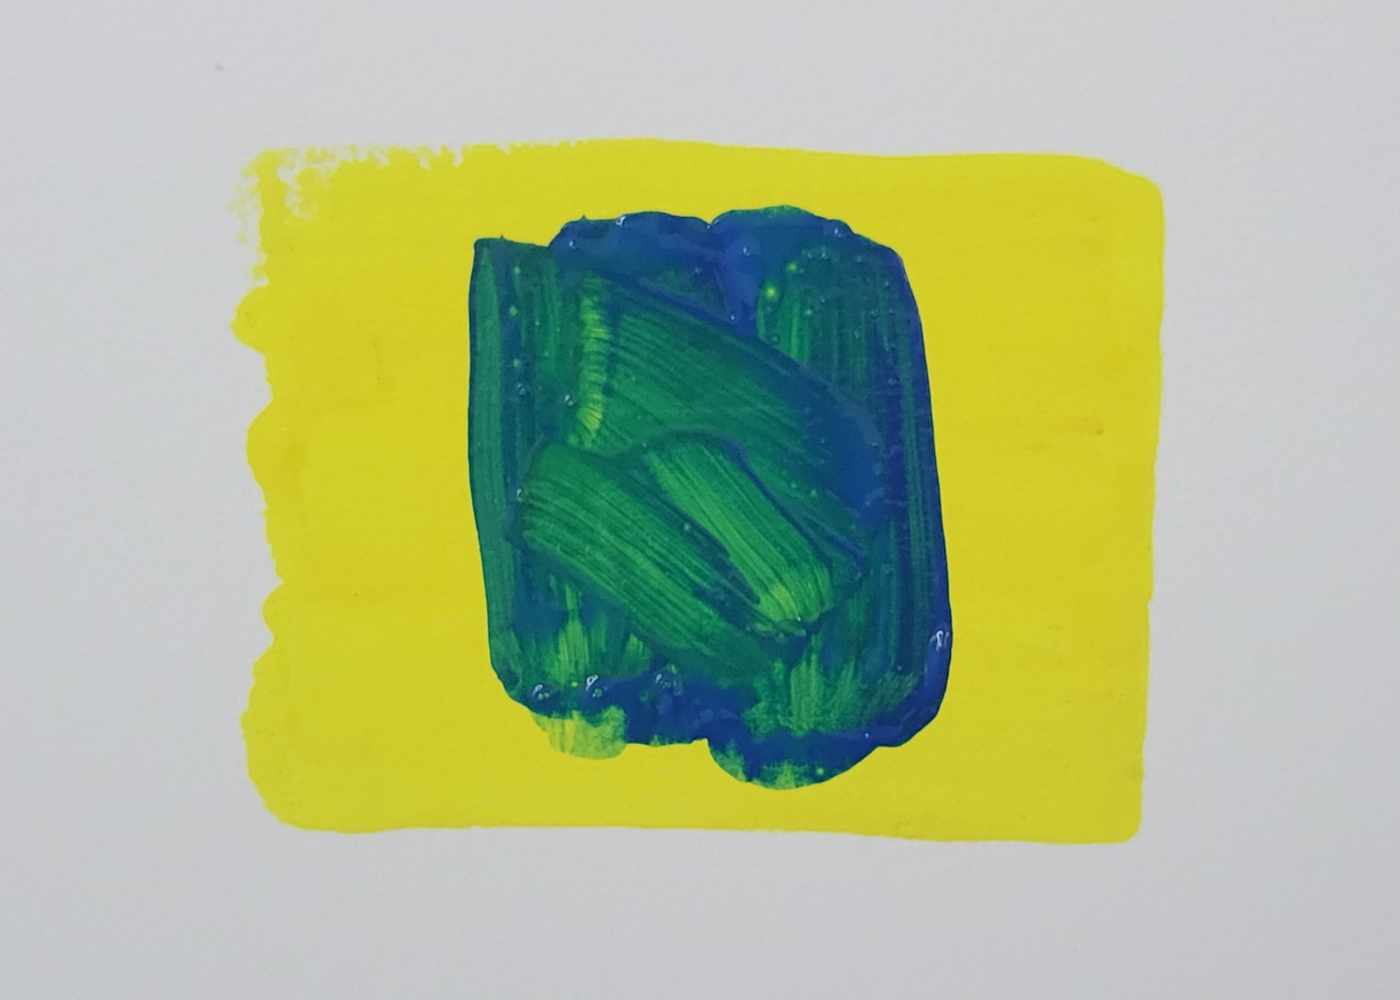
If you end up with muddy or streaked colors, it’s usually because the first layer is still wet. To fix it, stop and let it dry, then go over it with another layer of color. Some colors are also more transparent than others, so it may take a couple of coats to get a nice flat layer of paint.
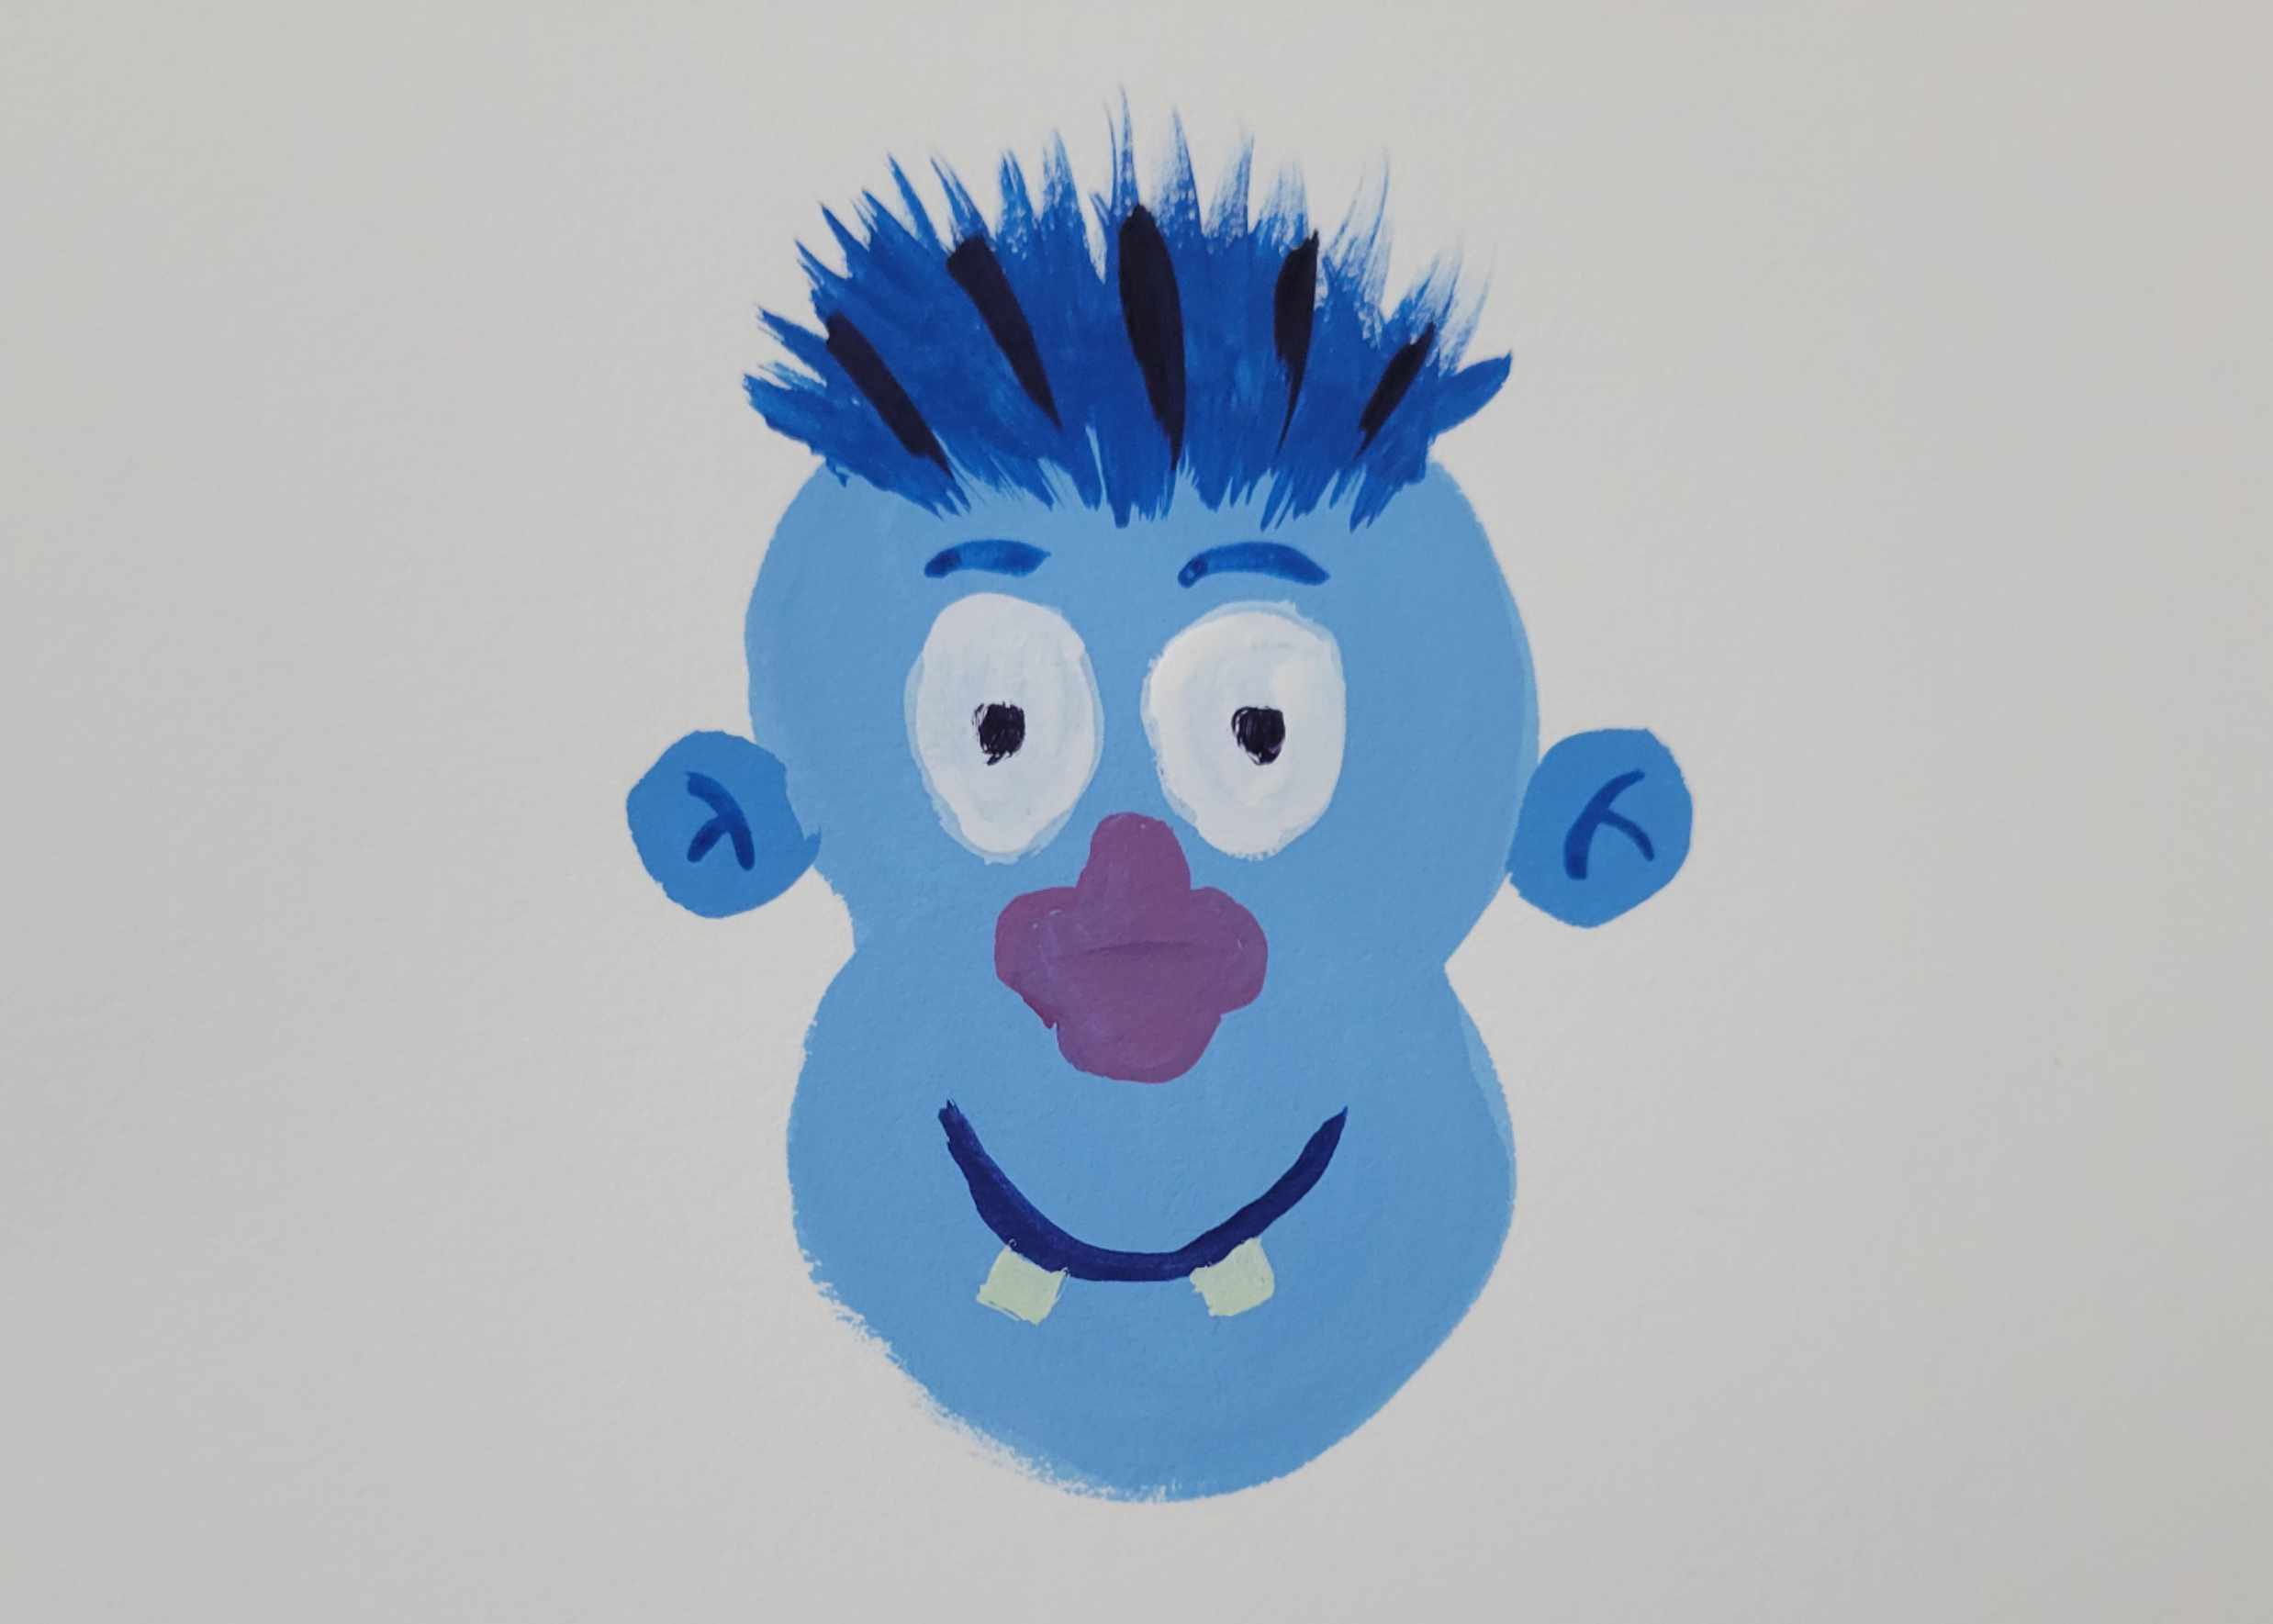
Character Demonstration
In this demo, I’ll show you how to create simple character faces using the layering technique. You can follow along or paint your own character. It doesn’t need to look exactly like mine. The important thing is to learn how to layer Gouache paint.
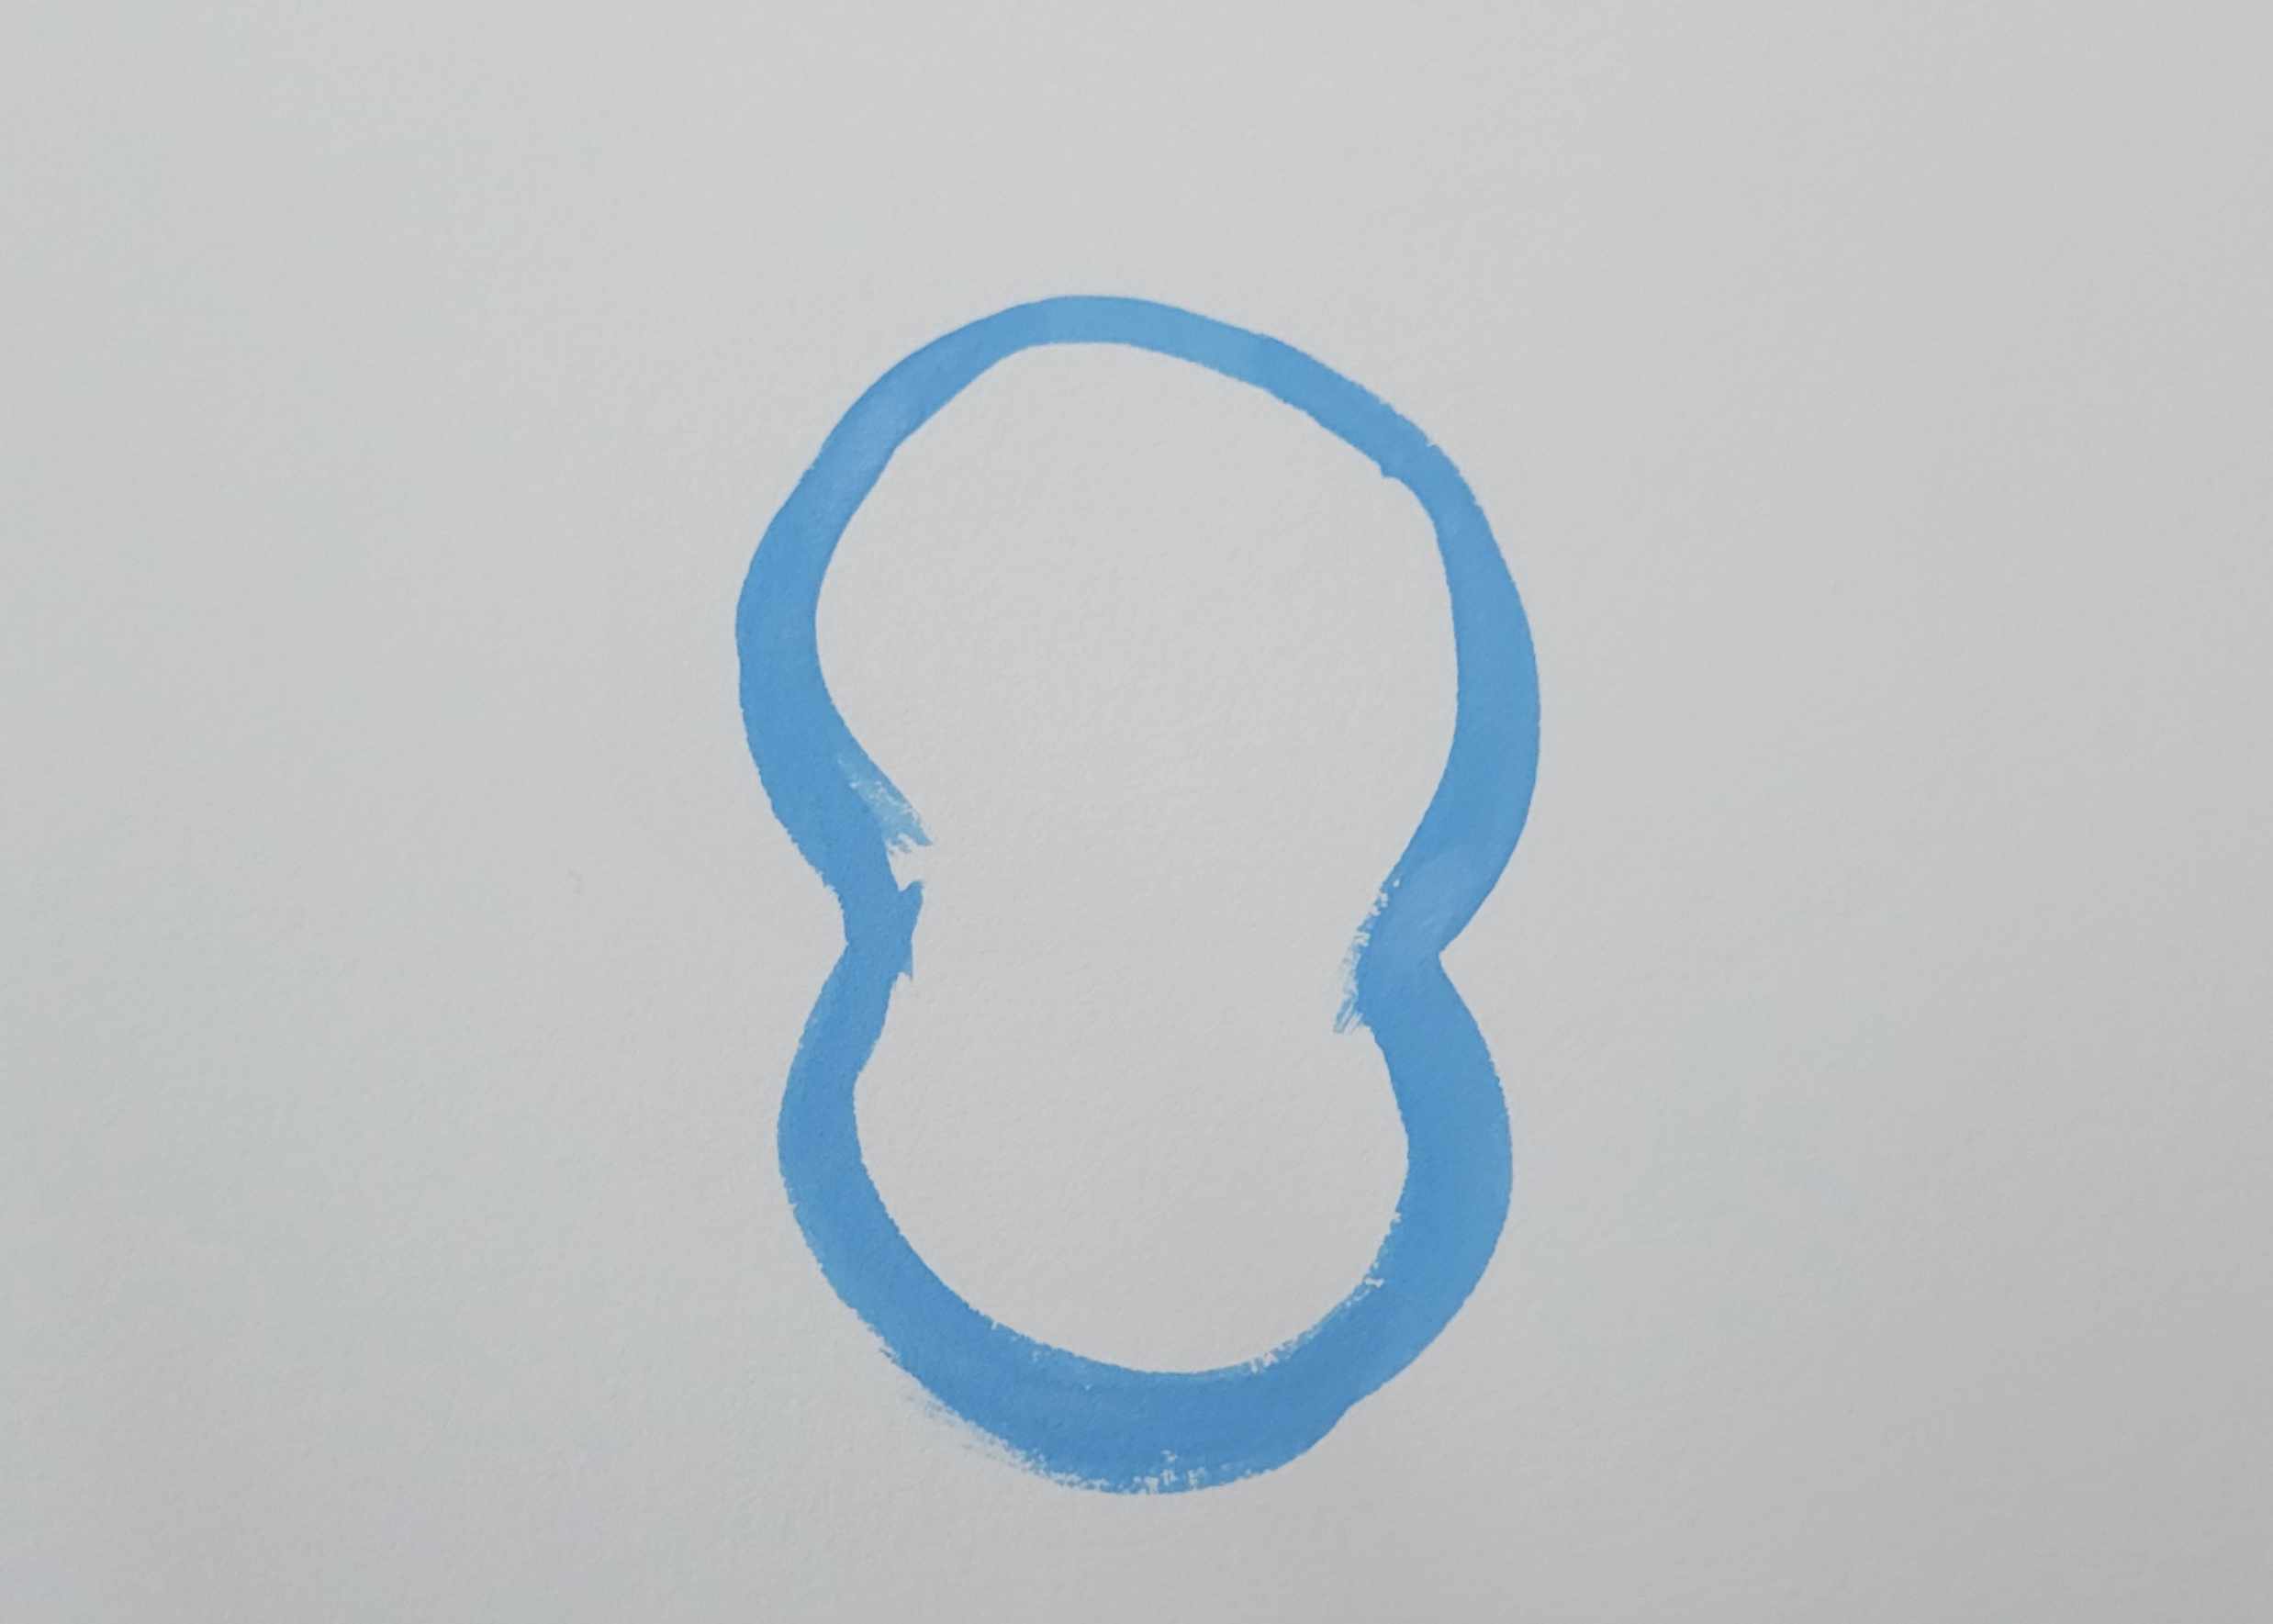
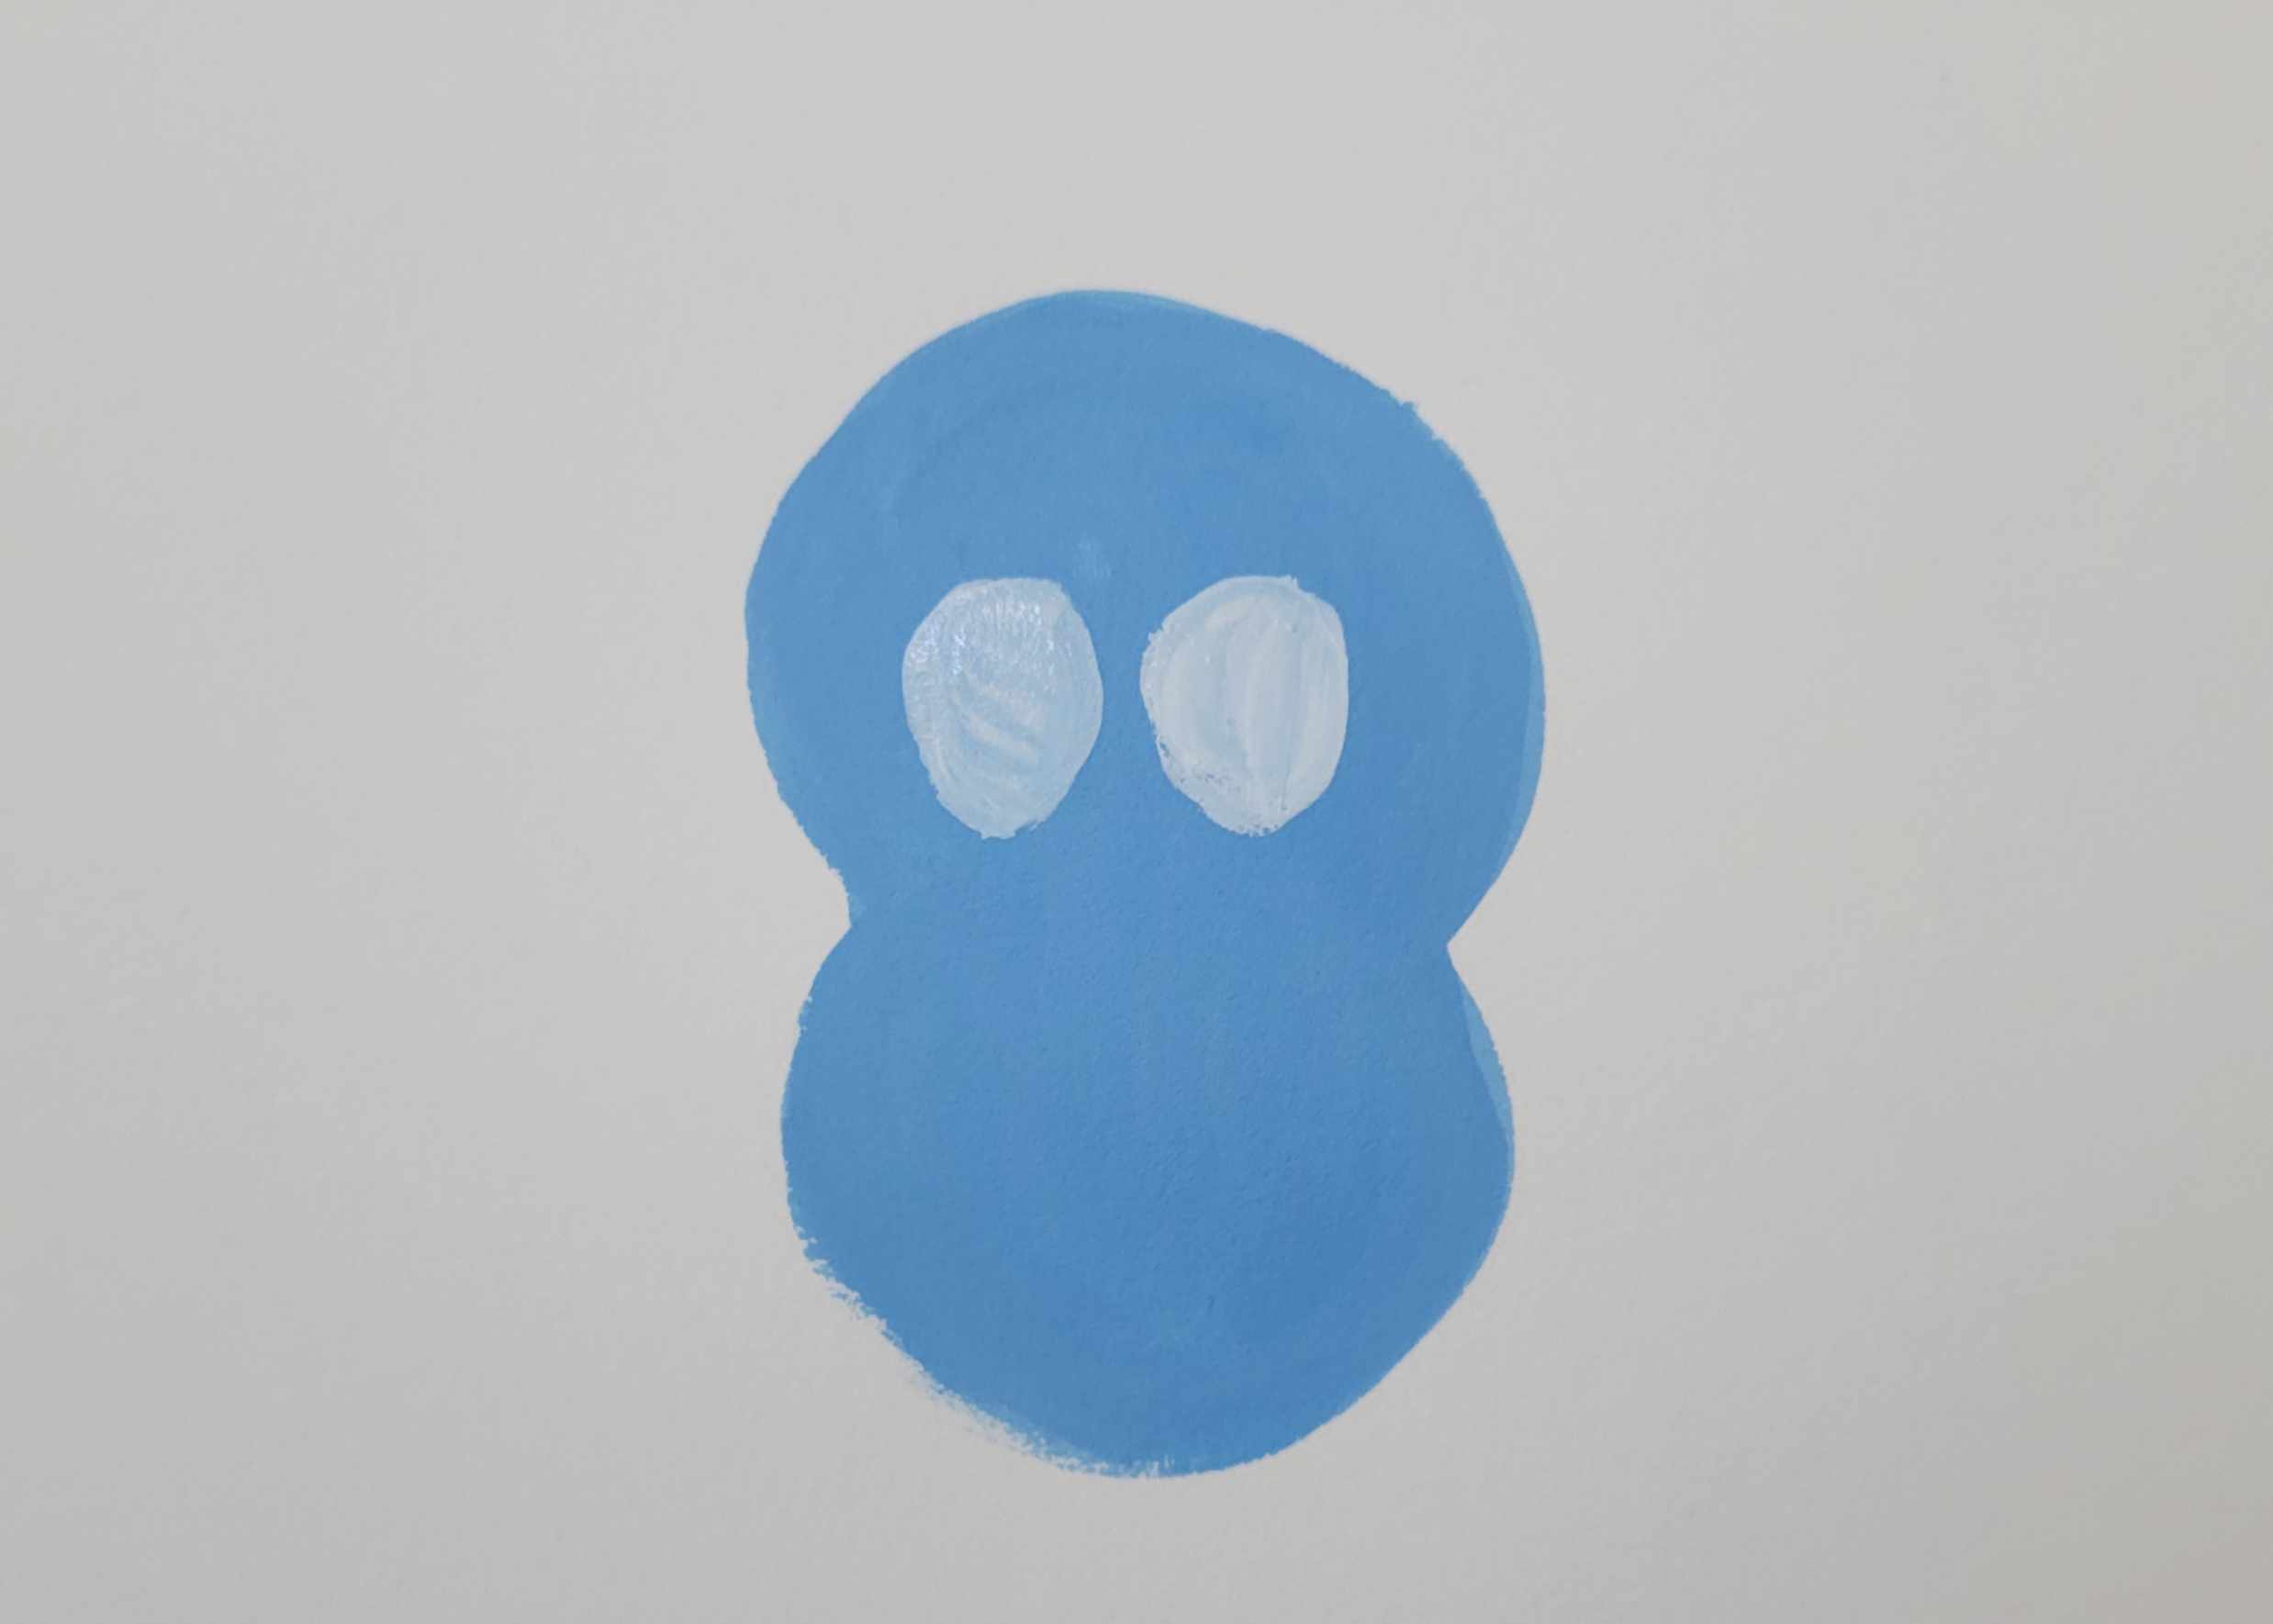
1. Mix Phthalo Blue with Permanent White to create a light blue paint and draw a peanut shape on your paper. Use the #6 round brush to paint this big shape. Load it up with paint and draw it, just like you would with a pencil.
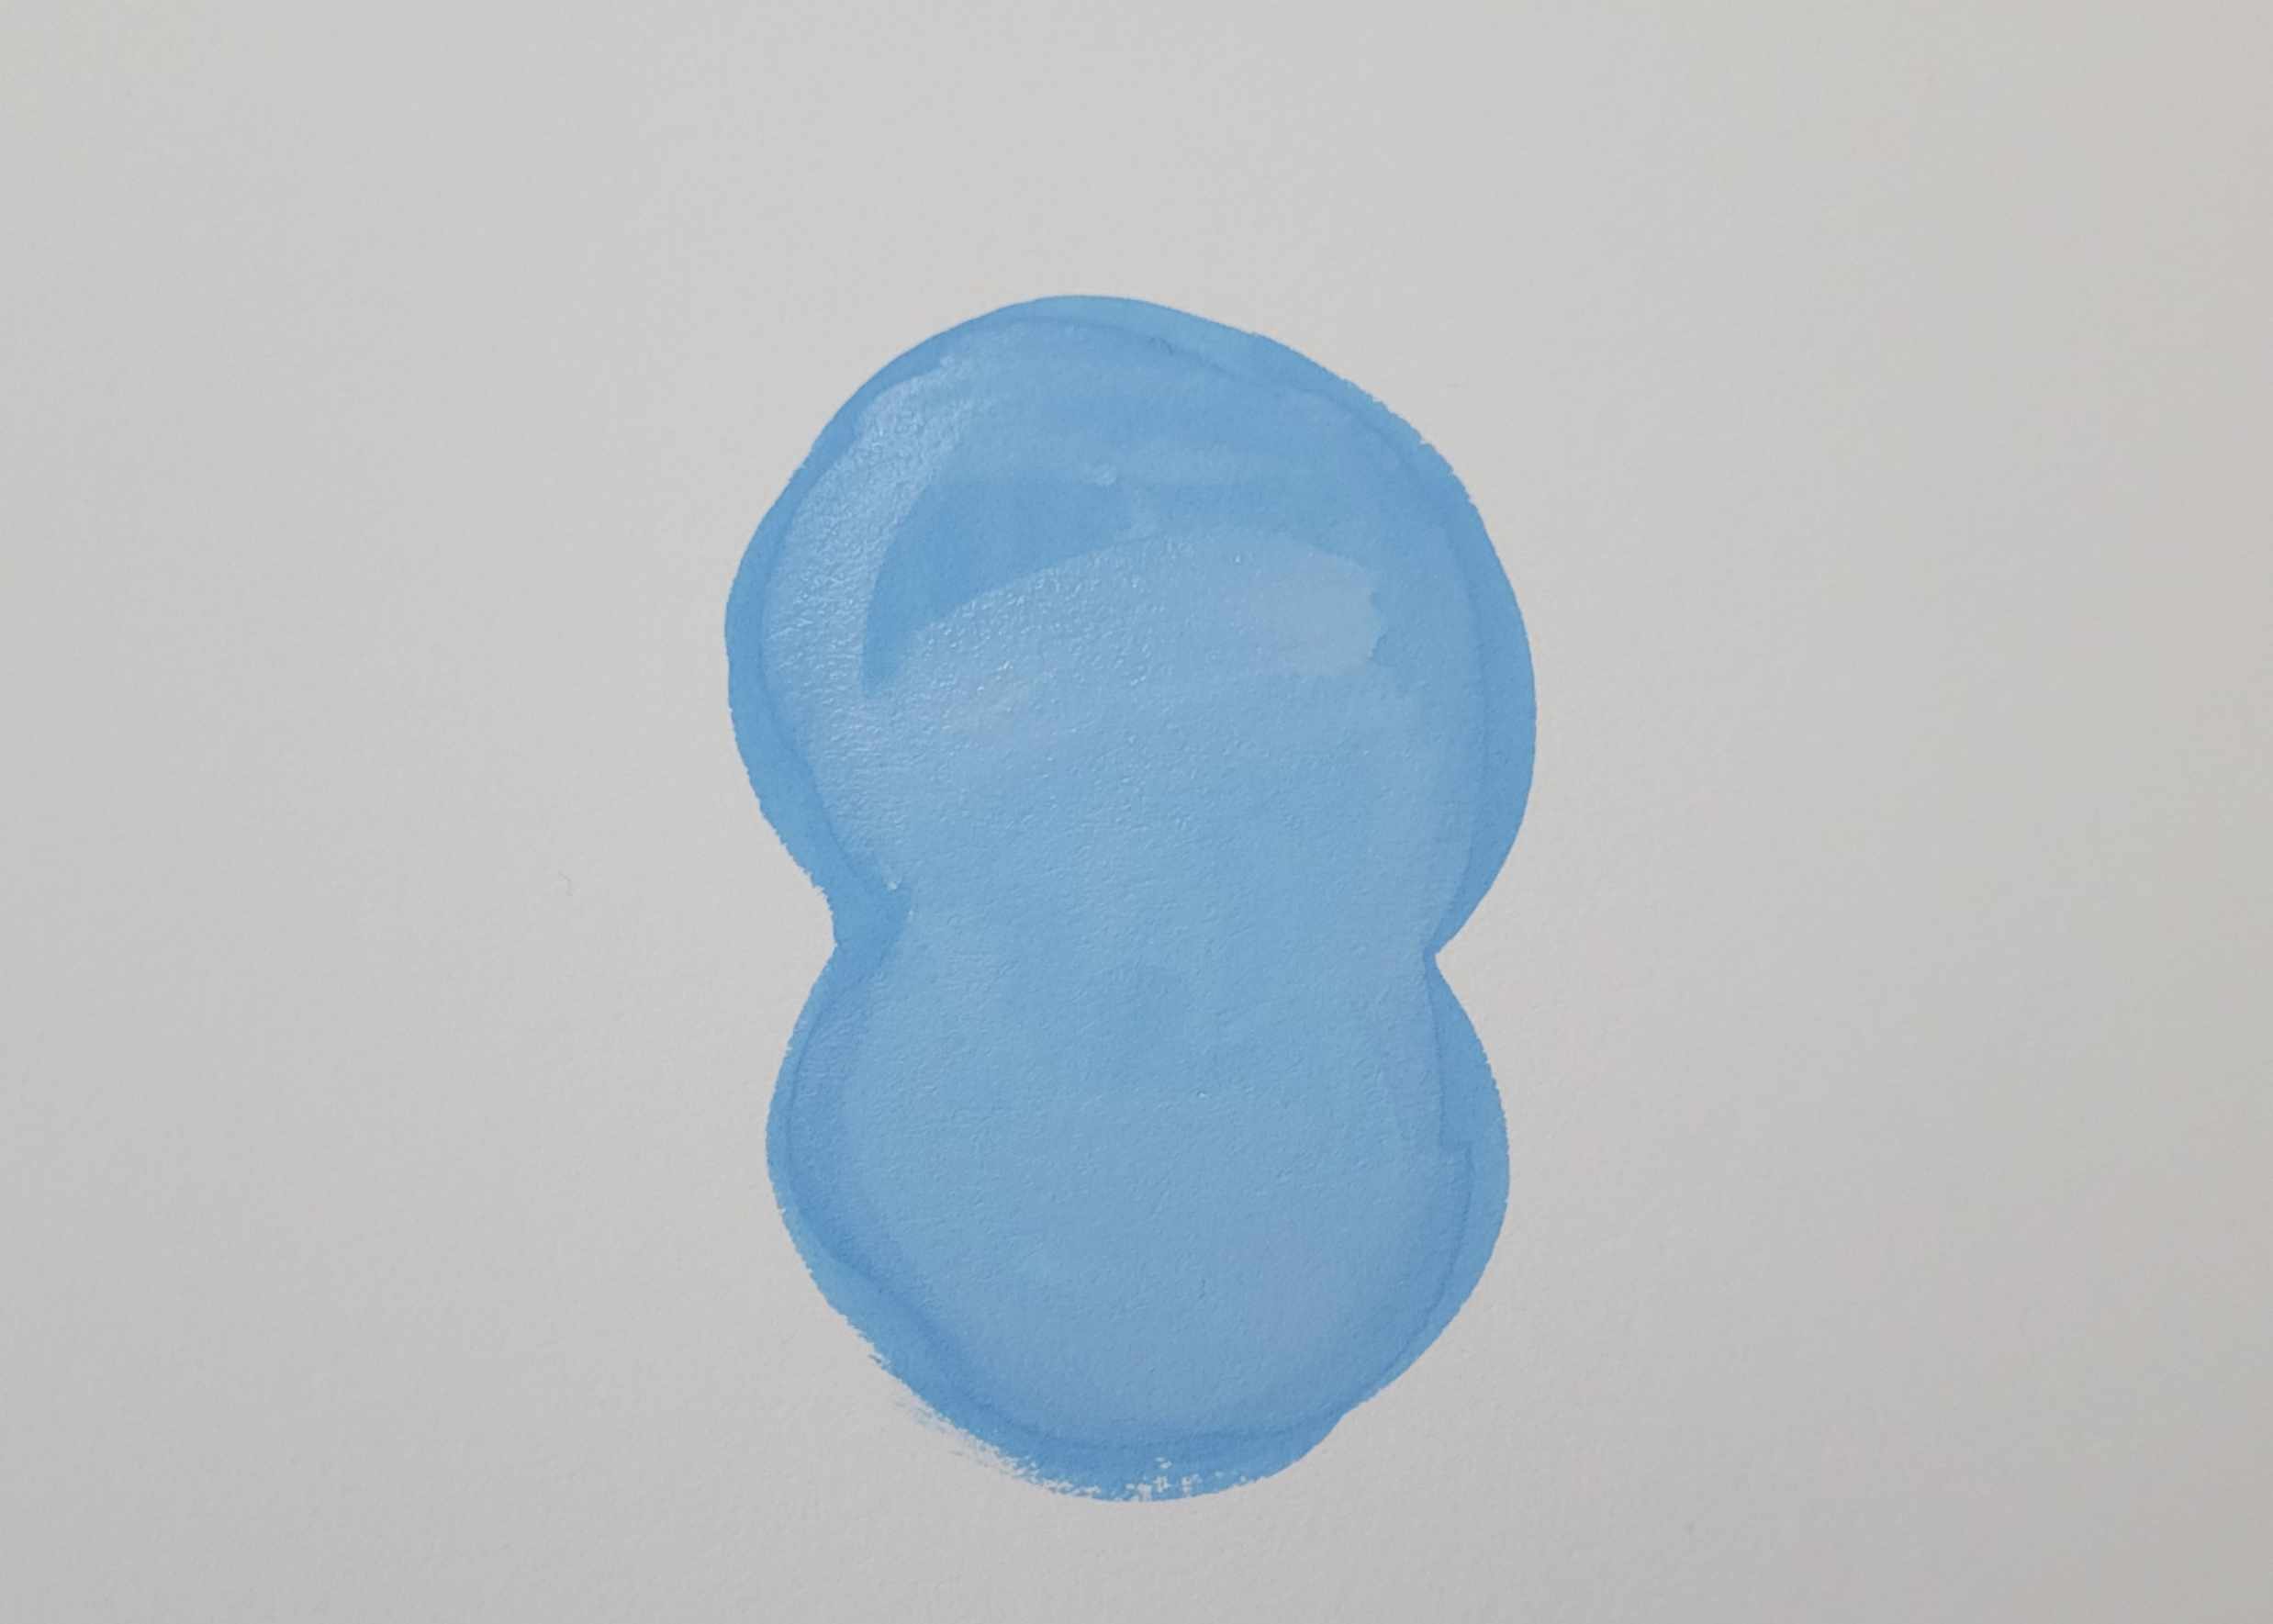
2. Fill in the shape with light blue and let it dry. Use horizontal, back and forth strokes to cover the whole area. You can use this technique for each part of the character in the rest of this tutorial. Draw an outline first, then fill it in.
3. Next, using Permanent White, draw two circles with your brush for eyes and fill them in.
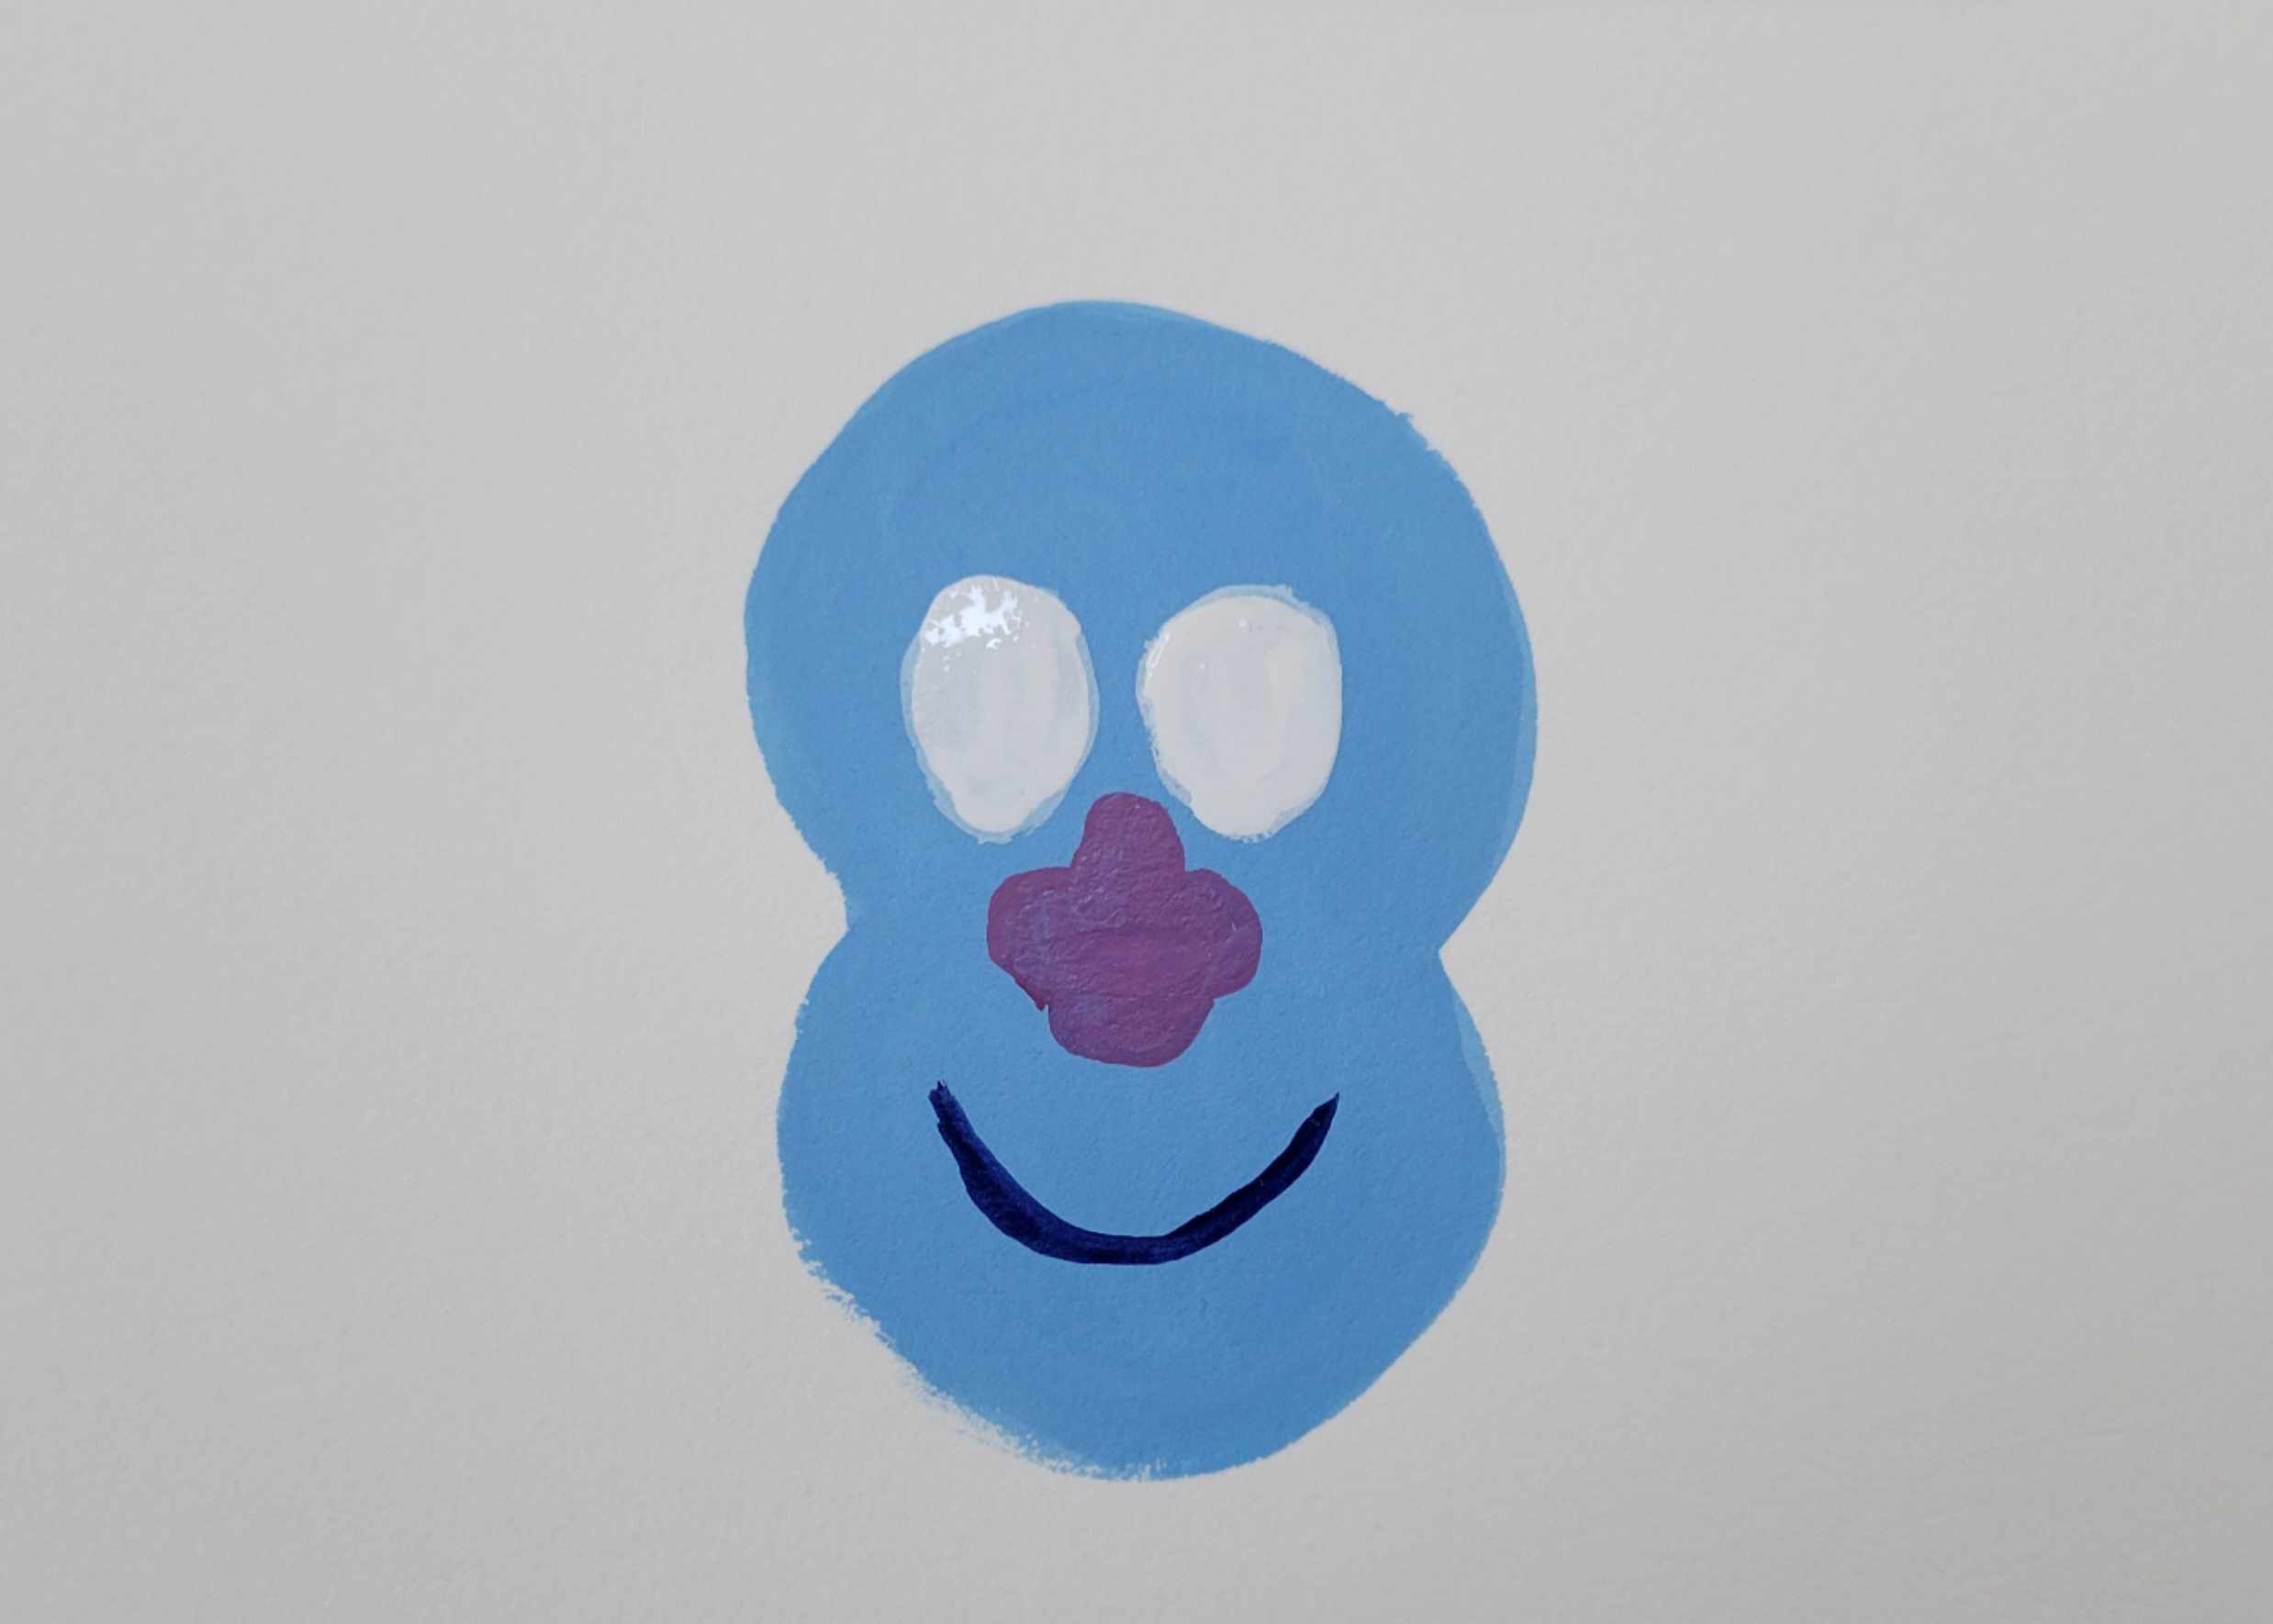
4. Mix Phthalo Blue, Permanent Rose and a little Permanent White to create a pinkish violet color and paint the nose. Remember, draw the outline first, then fill it in.
5. Switch to the #4 round brush to paint the mouth using a mix of Phthalo Blue and Permanent Rose to create a dark violet.
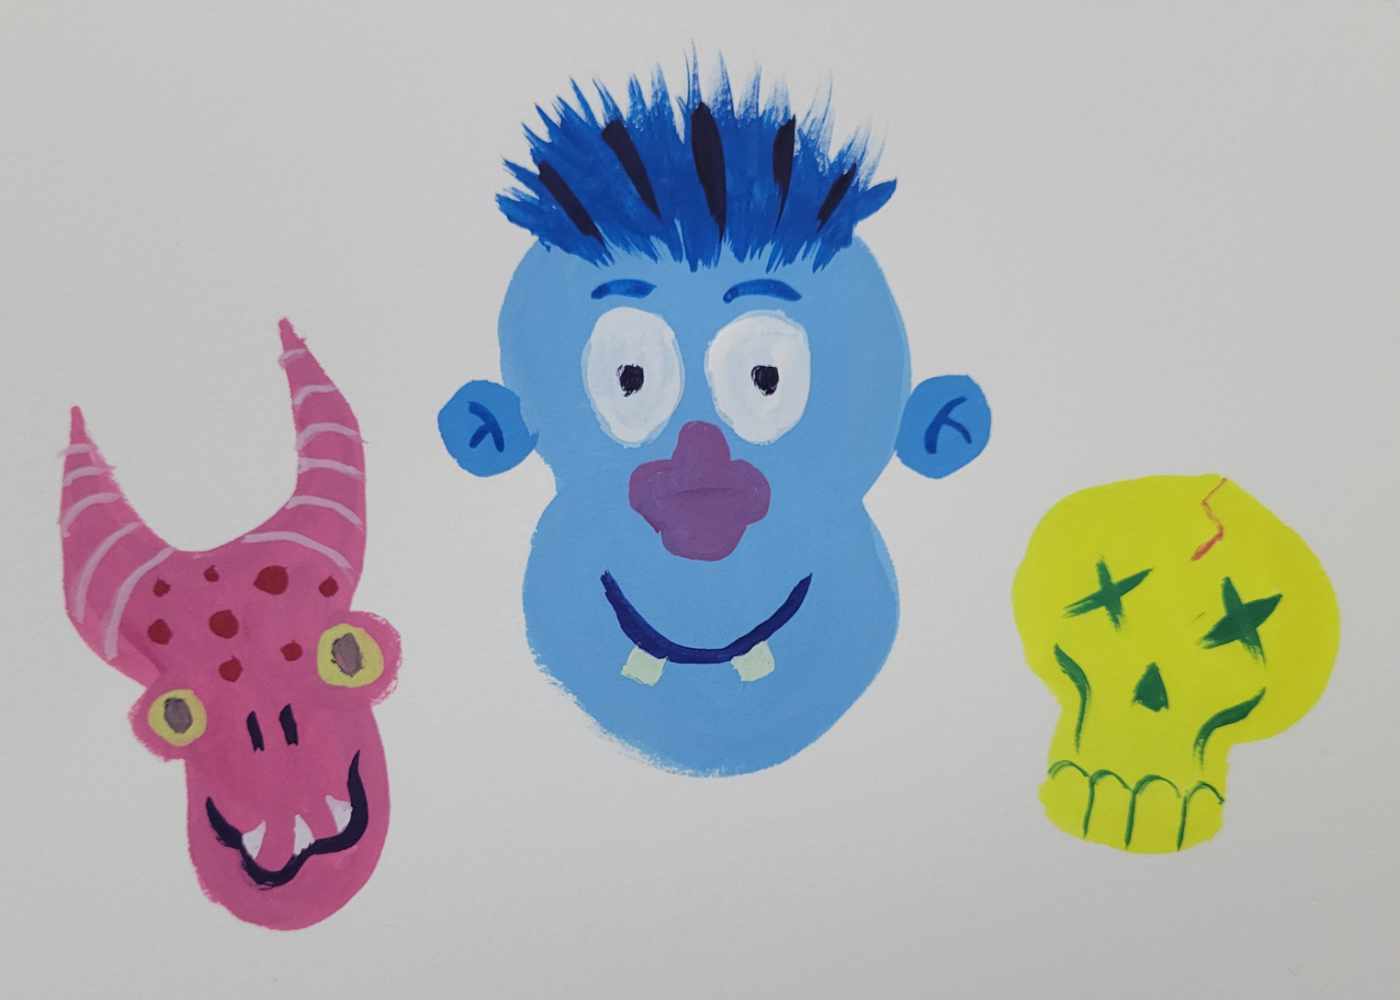
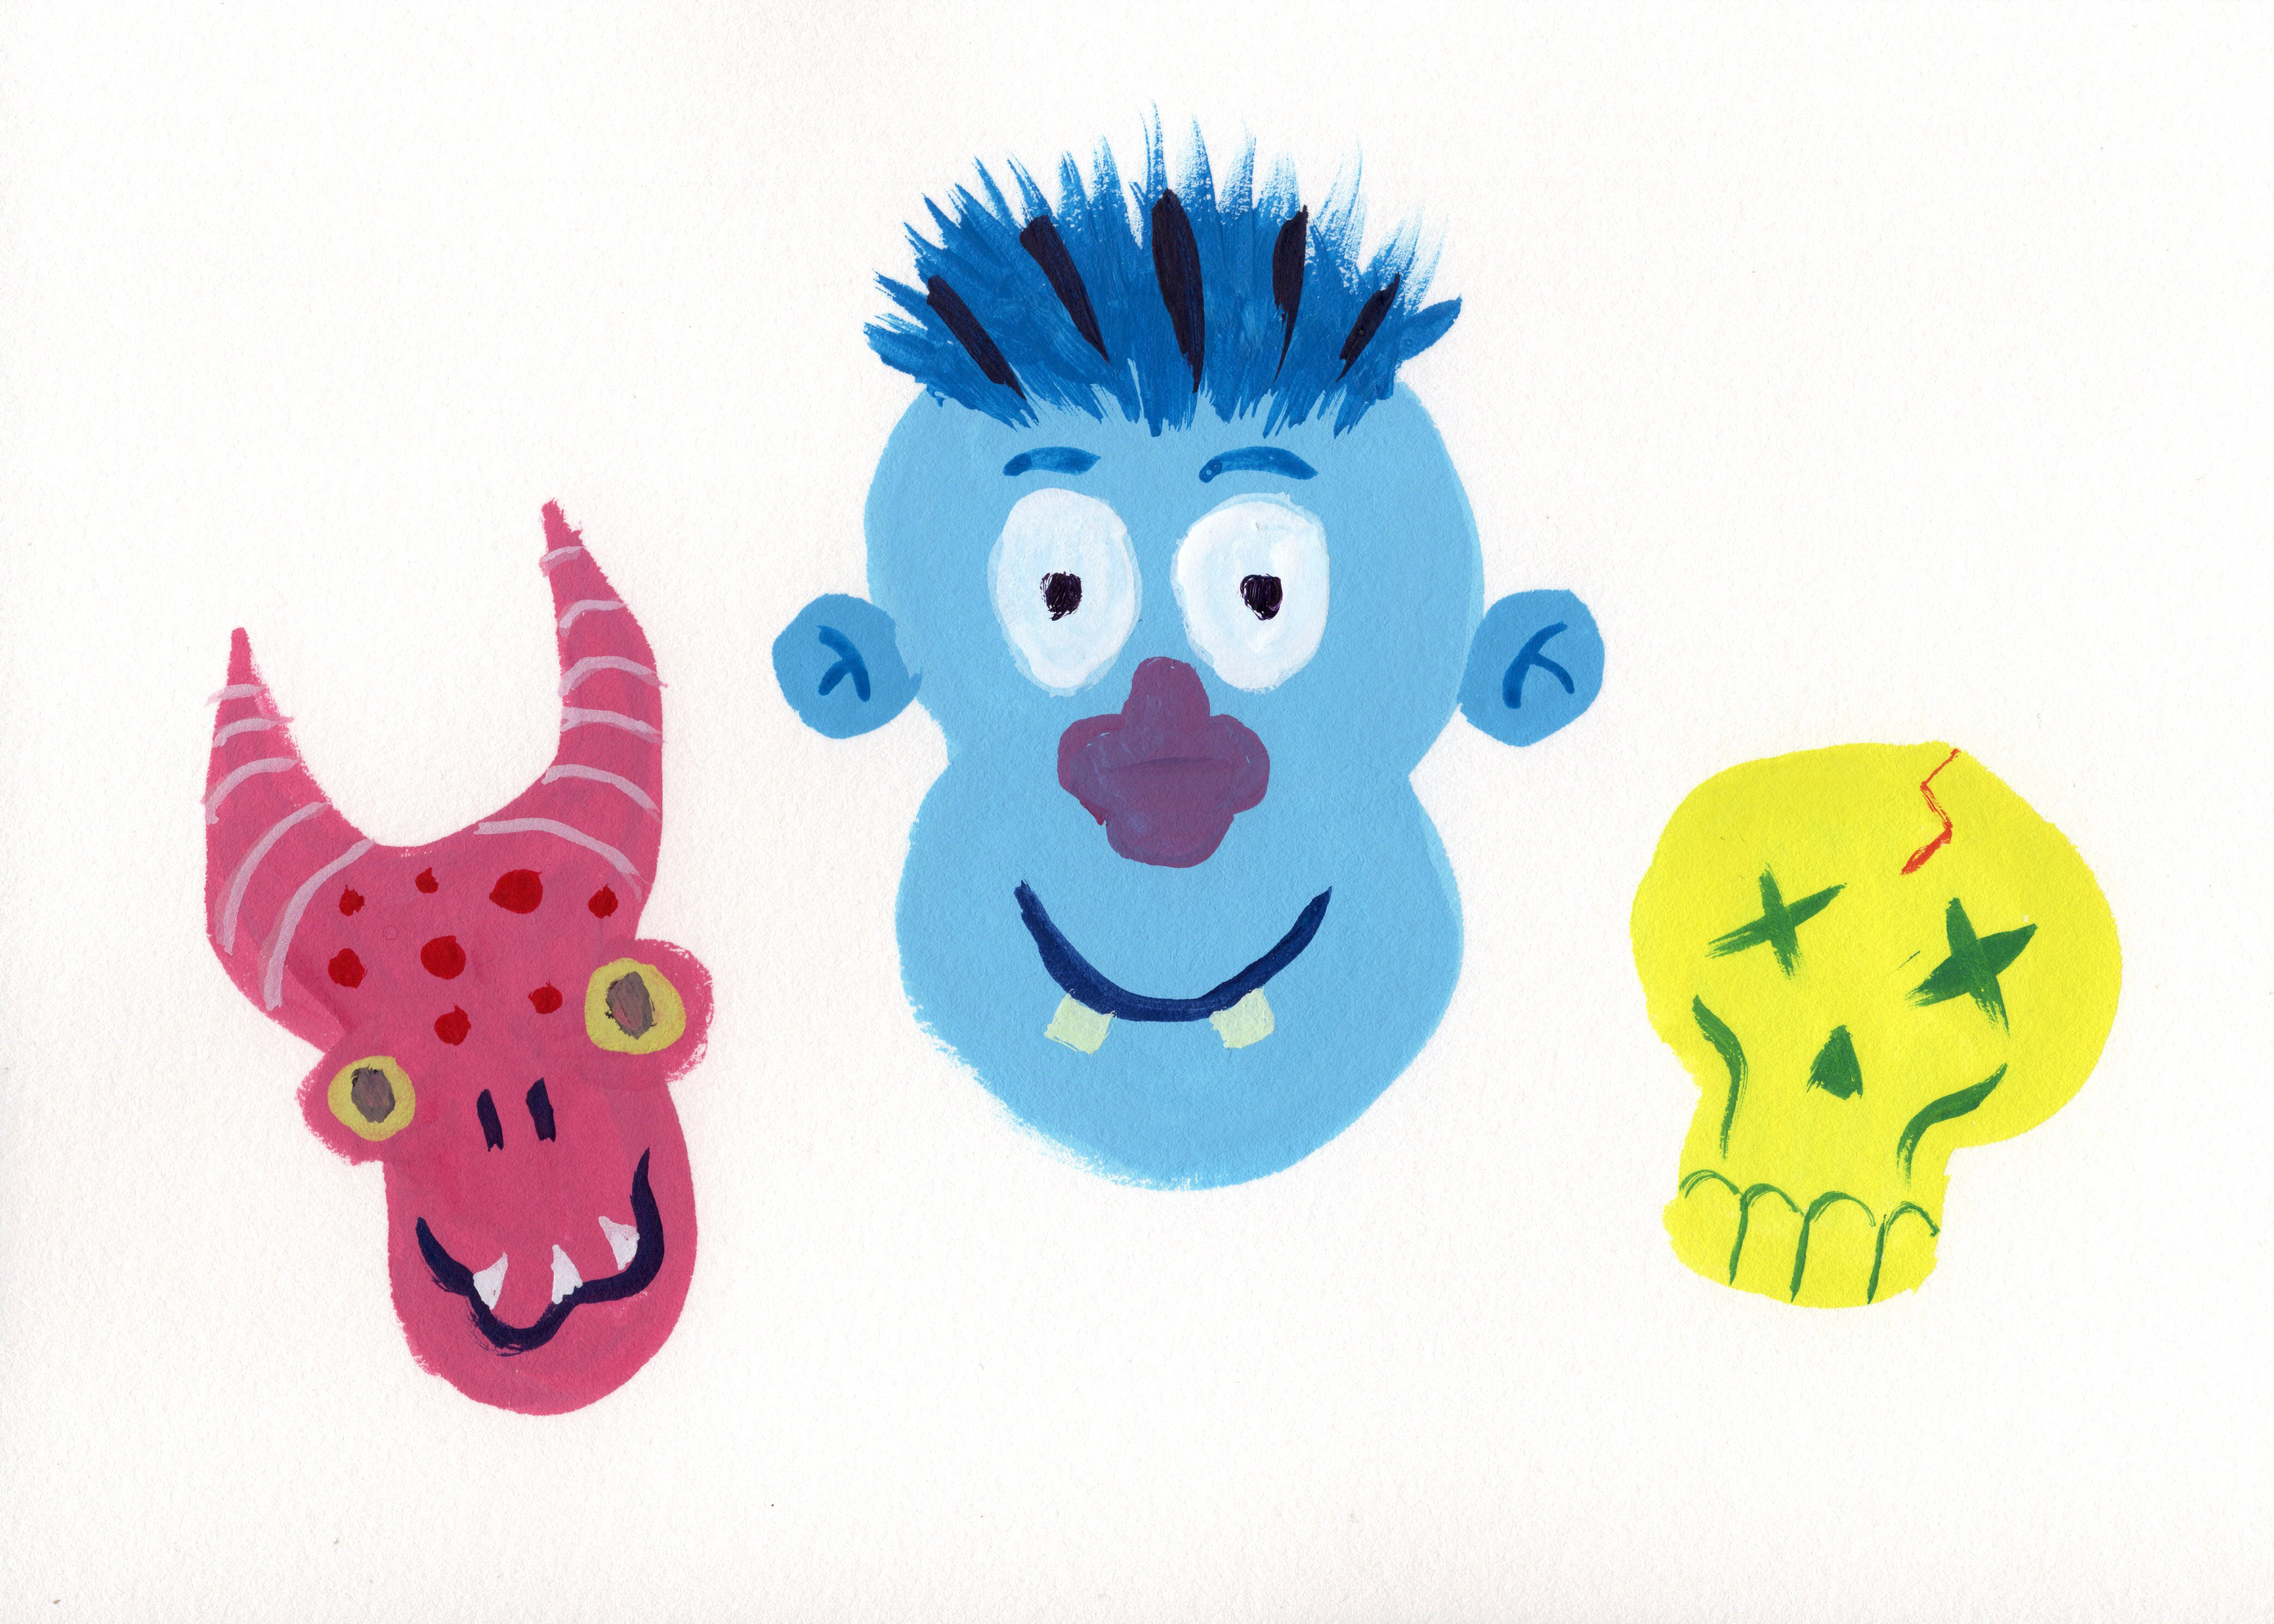
6. Use the same mix of dark violet to paint the hair. Use quick, vertical strokes. Start at the hairline and flick the paint up to create the spikey locks. When you finish the hair, stop and wait for the paint to dry before continuing. This will help prevent muddying your color when you paint the details.

7. With the leftover paint on your palette, paint ears and fine details. Draw them right on top of everything else. I added slightly darker blue ears, yellow teeth and dark violet strokes in the hair. But you don’t have to match what I did, paint the details that feel right to you.
8. When you feel like anything else you add might ruin the painting, or you just can’t think of anything else, that means it’s done. Congratulations, you finished your character! Stop and enjoy it for a minute.
Exercise
Paint 3-5 character faces on a sheet of watercolor paper.
Here’s my finished painting.